
 14/02/2020
  3587
3587


Інтернет-маркетинг
простою мовою
Content of the article

Installing Analytics/Clarity counters
Search engine counters are the so-called minimum gentleman’s kit for every Internet marketer, as well as any website owner who cares about resource traffic statistics.

Web analytics services not only record the number of clicks on portal pages, but provide a detailed analysis of audience behavior: the amount of time spent on a specific section of the resource, the territorial affiliation of each visitor, and much more. Studying the data obtained through counters helps to adjust the marketing strategy and interaction with customers.
What do Google Analytics and Microsoft Clarity counters provide?
The fact that statistics collection systems are only needed experienced professionals – a big misconception. Counters are needed by everyone who is interested in website traffic and increasing conversion. Web analytics installed on the site helps analyze:
- site audience and its behavior;
- conversion (number of active users of the resource);
- usability (site convenience for visitors);
- traffic sources.
Google Analytics and Microsoft Clarity are the most common services for collecting web statistics. The systems are very similar in terms of the set of functions and data provided. They are free, easy to install and collect basic information about the site’s audience (age, gender, country, time spent on the resource’s pages).
Creating a counter and adding Google Analytics code to the site
You need to start by creating a Google account. After logging into your profile, go to the Google Analytics page. The work begins with adding an account for the resource that the counter will analyze.
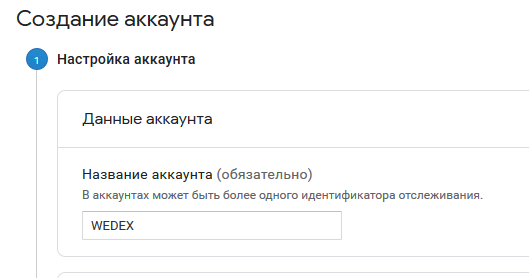
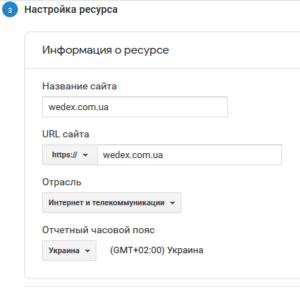
Next, when creating an analytics system, you need to specify the following data:
- type of resource (website/mobile application);
- account name;
- name and URL of the portal;
- field of activity (select from the list);
- time zone (selected based on the target audience).
After filling out all the lines, you need to click on the “get tracking ID” button. It will look like this:

The resulting code must be installed on the site. You can do this in two ways:
- place the code on all monitored pages in the <head> section;
- use Google Tag Manager (during setup, enter not the code, but the tracking ID).
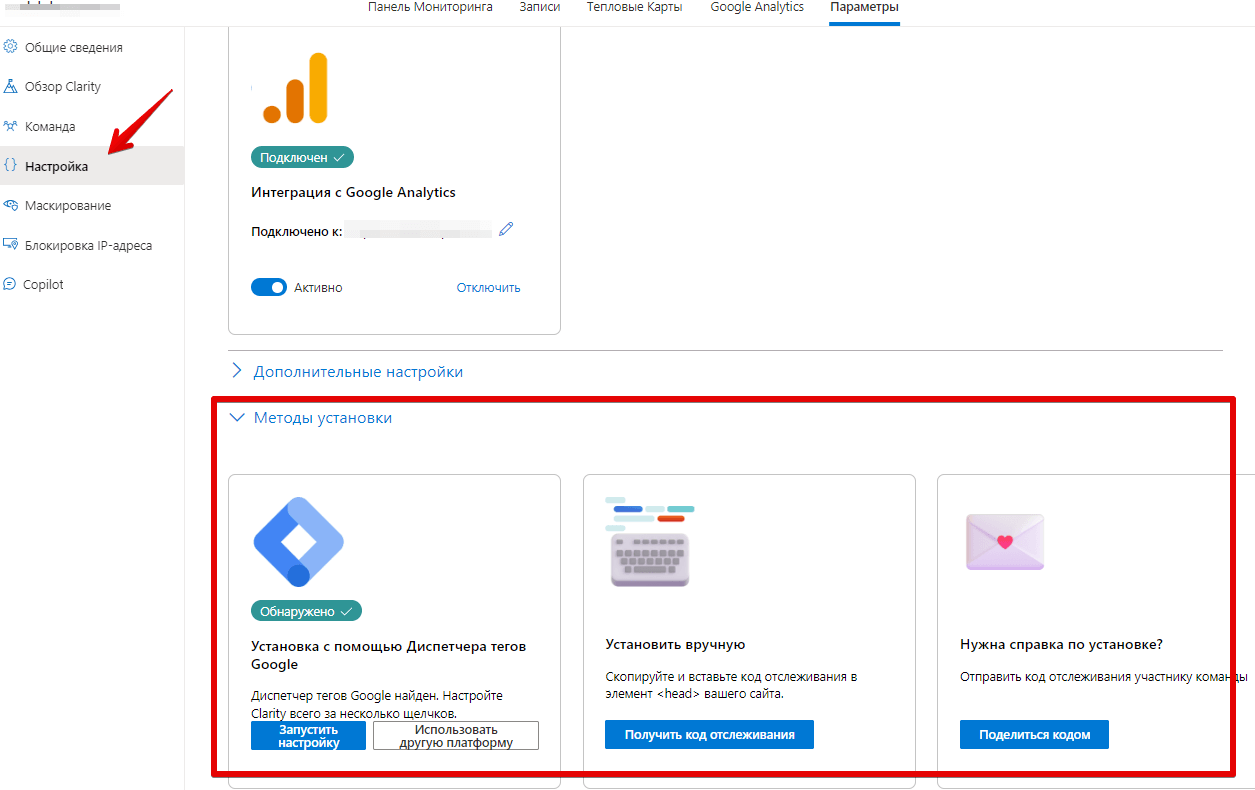
Creating a counter and adding Microsoft Clarity code to the site
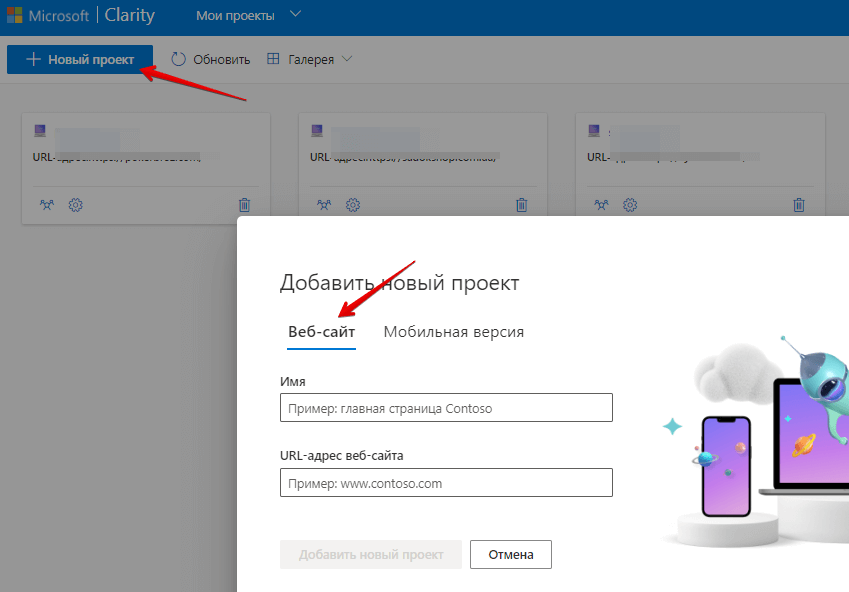
The work begins with registration on the Microsoft platform. After activating the account, the user has access to all available services, including Clarity. To receive the code, click the “New Project” button.
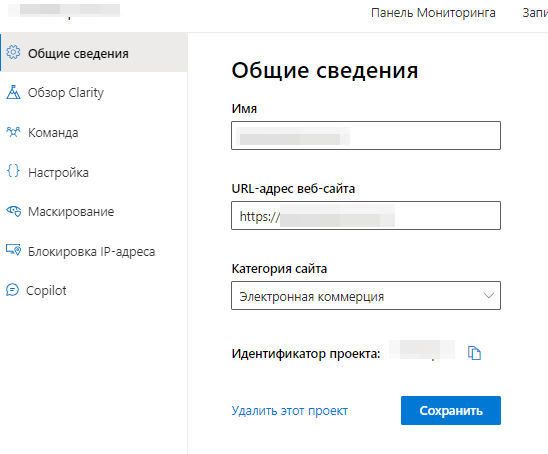
Then we set the settings for the counter in the “General” tab. You must specify:
- counter name;
- Site URL;
- site category.
After completing the settings, you need to install the counter code on all pages of the web resource for the most correct collection of statistics. This can be done using Google Tag Manager or manually.
Installing counters in different CMS
The counter installation algorithm depends on the site management system. We will look at the principle of working with the WordPress, Joomla, and Bitrix platforms.
You can upload a counter to WordPress in two ways:
- Install the plugin and enter the counter number there.
In the admin panel, in the Plugins tab, select “Add new”. In the search box, enter “google analytics” or “microsoft clarity”). Select the plugin you like and install it. After downloading and installing the plugin, enter the counter number in its settings.

-
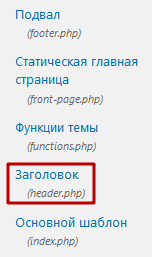
- Load the code onto the page manually.
In the admin panel, select the “Appearance” section, and then the “Editor” option. In the pop-up window, find the “Header” section (header.php), where we enter the existing code inside the <head>….</head> and <body>….</body> tags.
Installing the counter on the Joomla system is as follows:
We go to the admin panel of the site. Select “Extensions” – “Module Manager” at the top. Click “Create” in the upper right corner.

-
- In the window that opens, you need to select the “Custom HTML code” option. Fill in the Title field there. In the “Show title” field, select “No”; in the “Enabled” field – “Yes”; “Access” – “Everything”.
- Next, scroll down the page and insert the counter code into the custom text window.
Algorithm for uploading code to the Bitrix platform:
- Open the site admin panel. In the left column we find the “Settings” item. From the list that opens, select “Product Settings” – “Sites” – “Site Templates”.
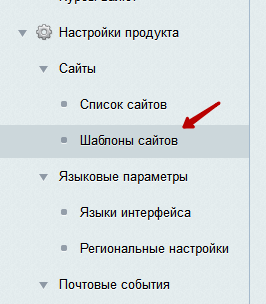
- Next, select a template for the counter and open it. Enter the code in the text field.

Save the changes. And the counter is displayed on every page of the site.
Conclusion
Without an analytics collection system installed on the website, it is impossible to fully promote the resource and product that the company sells. Search engine counters provide a substantive understanding of the site’s audience, help identify their interests and preferences, record conversions and evaluate the usability of the resource.
The fact is that competing systems (Google and Bing) do not completely share data with each other: Google counters collect complete information only from their search engine, and Bing – from theirs. In this regard, it is important for each optimizer to work with two web analytics systems at once.

commercial offer
Other articles by the author

16/09/2024
The main idea of parsing is to collect certain elements from pages (text, images, tables, or metadata) and save them in a convenient format, such as CSV or JSON. This helps businesses quickly obtain relevant data for decision-making, conduct competitive analysis, track trends, and automate processes, which significantly reduces time and resources.

21/06/2024
An SEO specialist is a person who is an expert in search engine optimization and bringing web resources to the top of search engines.
A competent SEO specialist understands not only website ranking algorithms, i.e. the principles of how search engines raise resources to high positions in search results, but also the basics of marketing, sales, copywriting, and advertising.

15/06/2024
SEO pagination is the numbering of pages on a website. It is usually presented in the form of a list of numbers or letters. Each number is a link that leads to a specific page. The pagination block is usually placed at the bottom or top of the site.
Latest articles by #Analytics

19/01/2026
Links form navigation for users, transfer page weight in SEO, and determine how search robots scan your resource.

12/01/2026
A drop in traffic or the sudden disappearance of a website from search results can be detrimental to a business. Often, the issue is related to Google's actions, ranging from algorithmic adjustments to manual penalties (bans).

08/01/2026
Anchor acts as a short communication signal: it tells both the user and search engines what the target page will be about.