
 13/06/2024
  4484
4484


Інтернет-маркетинг
простою мовою
Content of the article

What is the Google Index API and how to set it up?
Most site owners or SEO specialists have come across the fact that since relatively recently, Google has removed the ability to bulk submit pages for indexing from the Search Console functionality.
To facilitate the reindexing procedure, a special script was created – the Google Index API. And although for a long time this tool was considered relevant only for job search sites and with the presence of live broadcasts (as John Muller himself claimed), practice has shown that it is great for all web resources and data.
When may Indexing API be needed?
In the process of optimizing a website for search engines, it may happen that new pages that have been created and should be indexed in Google do not appear in the search results for a long time for various reasons.
Thanks to Indexing API you can send up to 200 pages for crawling and indexing every day (up to a maximum of 100 pages per request), which significantly speeds up the process from page creation to their appearance in organic search results.
So, while the search engine number 1 puts new spokes in the wheels of webmasters, we bring to your attention detailed instructions for installing and configuring this script.
Step 1 – Create an API project
Go to the Google API Console
To do this, go to this link.
Check boxes and continue.
Next, from the list of options, you must select “Create a new project” or “Create project”, depending on the language.

Next, you will be presented with the following screen:
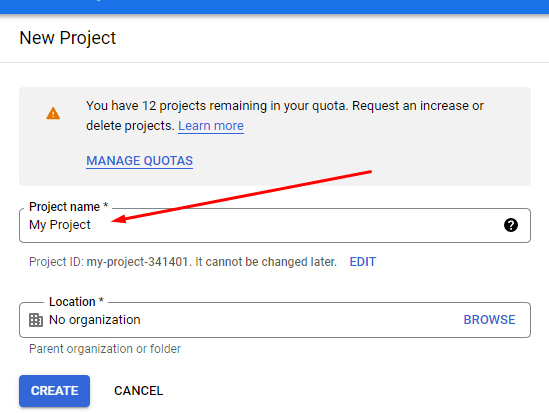
The name of the future project should be entered in the top line, and the bottom line can be left blank.
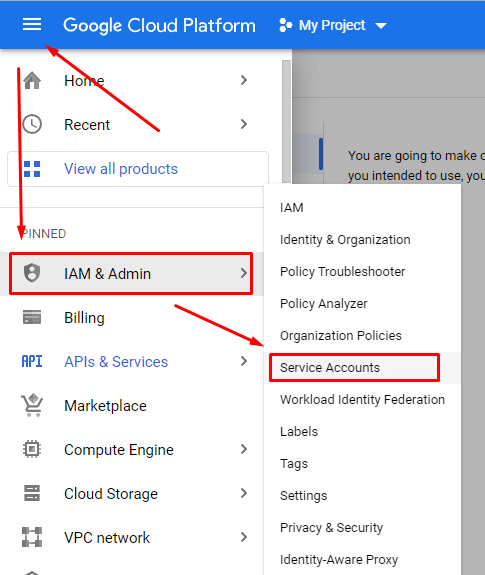
Next, go to “service accounts” through the main menu:
In the next window, you need to fill in only the first line (required in Latin):
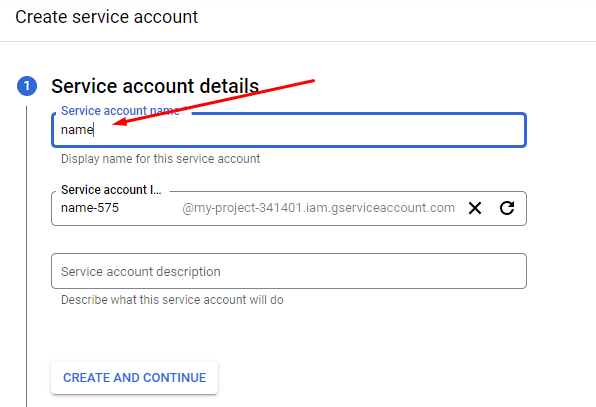
The second line will be generated from the first, and the third can be left unchanged.
In the next window, you must select the user status. In our case, select “Owner”.
Click “Finish” and see your first created account in the list:

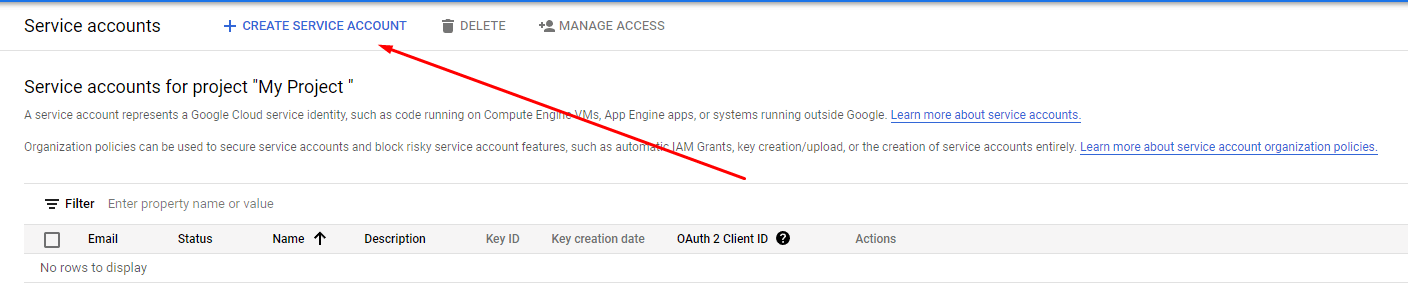
Now it’s time to upload our API key file.
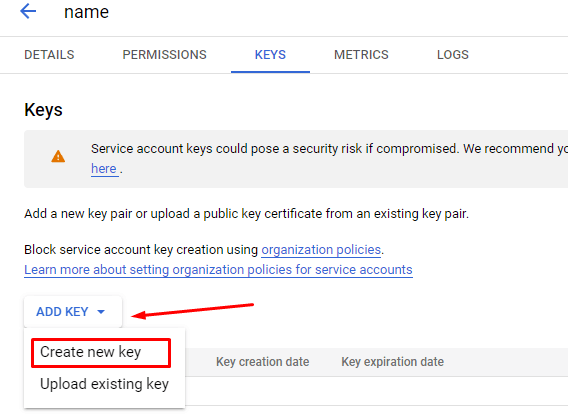
In the window where your new account is displayed, click on the 3 dots in the action column and select “Key Management”:

Next, select “Add key” and “Create a new key”:
Next, we offer a choice of 2 key formats, where JSON is already selected by default, which is what we need, click the “Create” button:
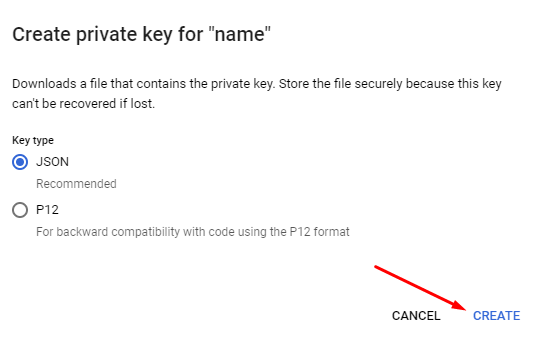
If you followed the instructions exactly, then a .json file should be downloaded to your computer.
Step 2 – Customizing the Script
First, download the script here.
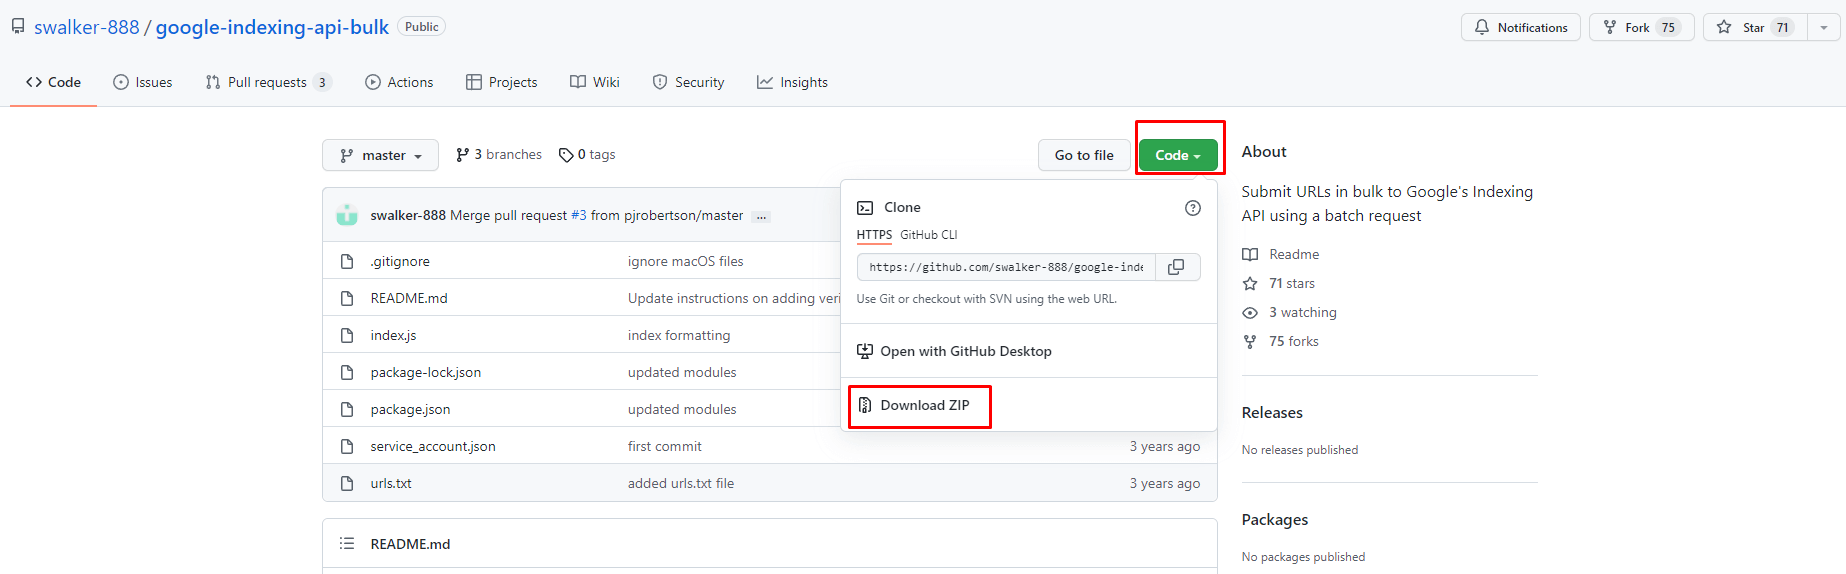
After downloading, unpack the archive.
We find the “service_account” file in the unpacked archive and open it.
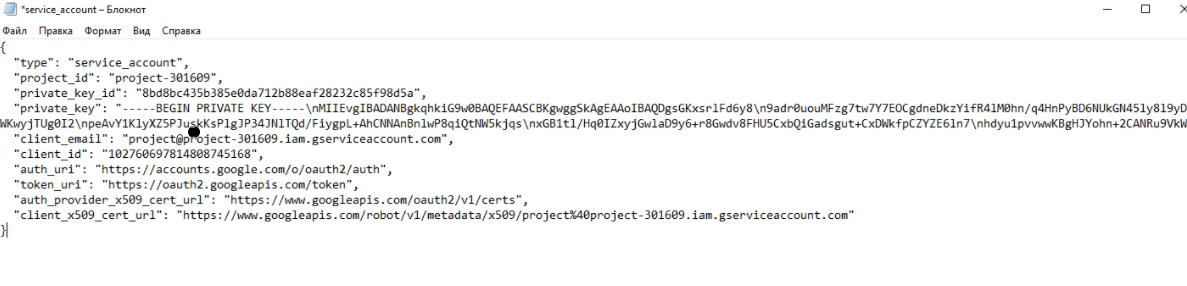
Next, we replace all the contents with data from the previously received .json file.
Step 3 – Linking the Script to Google Search Console
Open Google Search Console and go to the project.
Next, go to the settings and click “Add user”.
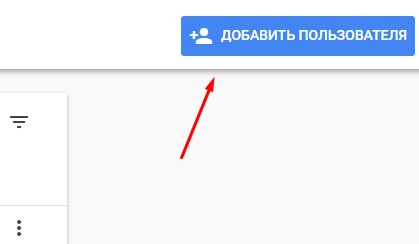
On the next screen, we will see 2 fields:

In the first, enter the email address that was previously created in the Google Cloud Platform (in the image below), and in the second, select “Full access”.
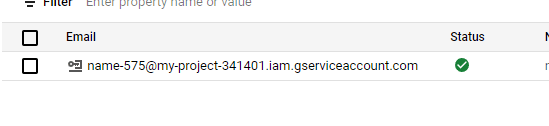
Next, we need to select the line where we have the type of rights “owner”, click on the three dots and click “Add owner” and again insert the address from the Google Cloud Platform created earlier.
If everything is done correctly, then the status “Owner” will appear opposite the account:

Now enable the Google Index API. To do this, go to here.
Select our project and click “Enable”:

Step 4 – Activating the Script
Among the unpacked archive we find the file “urls”. Open it and enter all the URLs there. that need to be indexed. Up to 200 urls can be sent per day.
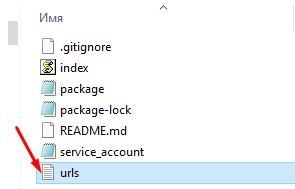
Next, download the node.js source code here.
After that, go to the command line and go to the google-indexing-api-bulk-master folder that you downloaded earlier.
By default, the folder will be at Desktop – Roots – google-indexing-api-bulk-master.
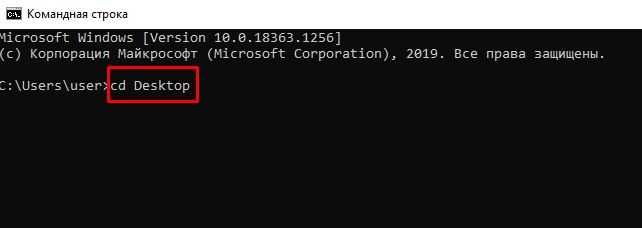
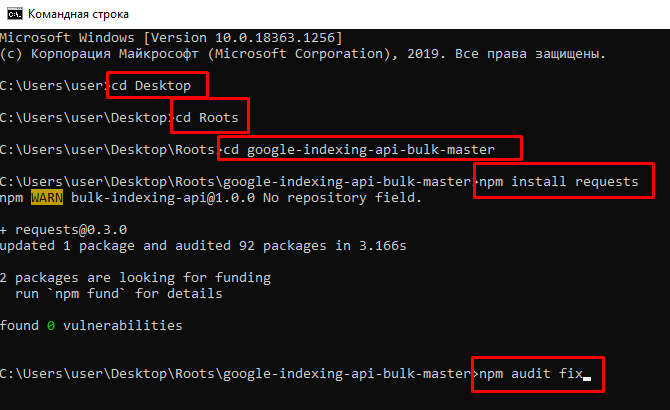
Go to the folder “cd Desktop”.
Add “cd Roots” in a new line and press “Enter”.
In a new line, add “cd google-indexing-api-bulk-master” (file location folder) and press “Enter” again.
The next step is to upload the library files to the same folder. To do this, there are the following commands:
C:\Users\user\Desktop\Roots\google-indexing-api-bulk-master> npm install requests
C:\Users\user\Desktop\Roots\google-indexing-api-bulk-master> npm audit fix
C:\Users\user\Desktop\Roots\google-indexing-api-bulk-master> npm audit fix –force
We enter these values each from a new line and wait a bit for the data to load.
After installing all the library files, run the last node index.js command.
The result should be the following:
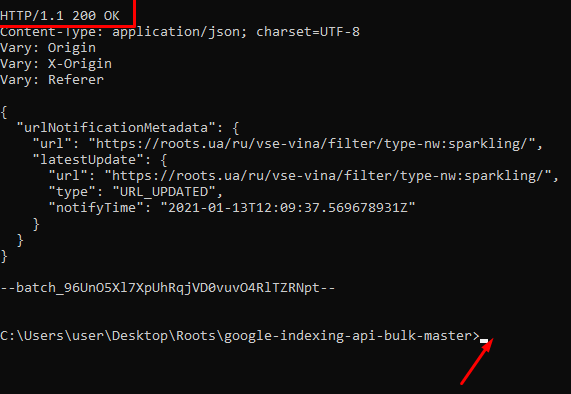
When you want to index the next pages, just remove the old urls from the urls file and put in the new ones.
In the command line C:\Users\user\Desktop\Roots\google-indexing-api-bulk-master> add node index.js and press “Enter”.
But this is only for the current project. For new ones, everything will have to be done all over again.
To summarize
In this article, we looked at the Google Index API – a powerful tool that allows website owners to manage the process of indexing and deleting pages. Thanks to this, SEO specialists can effectively promote their sites by speeding up the process of new pages appearing in search results. We also explored how to customize the Index API to send notifications to the search engine when pages are added or removed. By customizing this tool, webmasters are able to control the indexing of their site and achieve better organic results. Using Google Index API is an important part of optimizing a website to improve visibility and attract a targeted audience.

commercial offer
Other articles by the author

30/07/2024
Indexing is a process where search engine crawlers (spiders) search for new pages on the Internet, analyze their content, and store this information in their index. From time to time, the crawlers return to the already indexed pages to check for changes and update the information.

10/09/2024
In the modern world, where speed plays a key role, it is important to take this indicator into account. Slow loading speed can lead to the loss of visitors and lower rankings in search engines, as search algorithms take into account loading speed as an important factor.

23/07/2024
Marketplaces are not only sales platforms, but also places where manufacturers, distributors, and small businesses can find their customers around the world. They provide security of transactions, a variety of choices, and help to increase competition and improve the quality of service.
Latest articles by #SEO

08/05/2026
Influencer marketing for businesses is not just a way to draw attention to a brand. When part of a well-designed strategy, it helps achieve multiple objectives at once.

06/05/2026
A workshop is an interactive, hands-on session during which participants listen to an expert and work together on a specific task.

30/04/2026
Mandela effect proves that our perception of reality may differ from objective facts.