

 04/09/2026
  1313
1313

Інтернет-маркетинг
простою мовою
Content of the article

Instagram shopping for business: a step-by-step setup guide

A presence on Instagram has long gone beyond simply posting aesthetically pleasing content. For most retailers and local brands, it’s a full-fledged sales channel where the customer journey should be as short as possible. The Instagram Shopping tool lets you turn regular posts, Stories, and Reels into an interactive storefront where customers can view products, check prices, and complete a purchase in just a few clicks. Eliminating the extra hurdle of endless back-and-forth messaging in DM about price or availability is a direct way to boost conversion rates.
In this article, we’ll break down Meta current requirements, the preparatory steps, and a step-by-step guide to help you set up Instagram Shopping for your business without any mistakes, as well as what to do if your application is rejected during moderation.
What is Instagram Shopping and how does it work
Instagram Shopping is a set of Meta features that allows businesses to link their product catalog to their social media profile. The main element of the tool is Product Tags. They can be added to photos or videos in the feed, stickers in Stories, or integrated into Reels.
When a user taps on a tag, a product card opens within the app. It displays the name, current price, description, additional photos, and availability.
It’s important to consider how the tool works in different regions. Placing an order within the app is primarily available for businesses registered in the U.S. In this case, the buyer pays for the item without leaving Instagram.
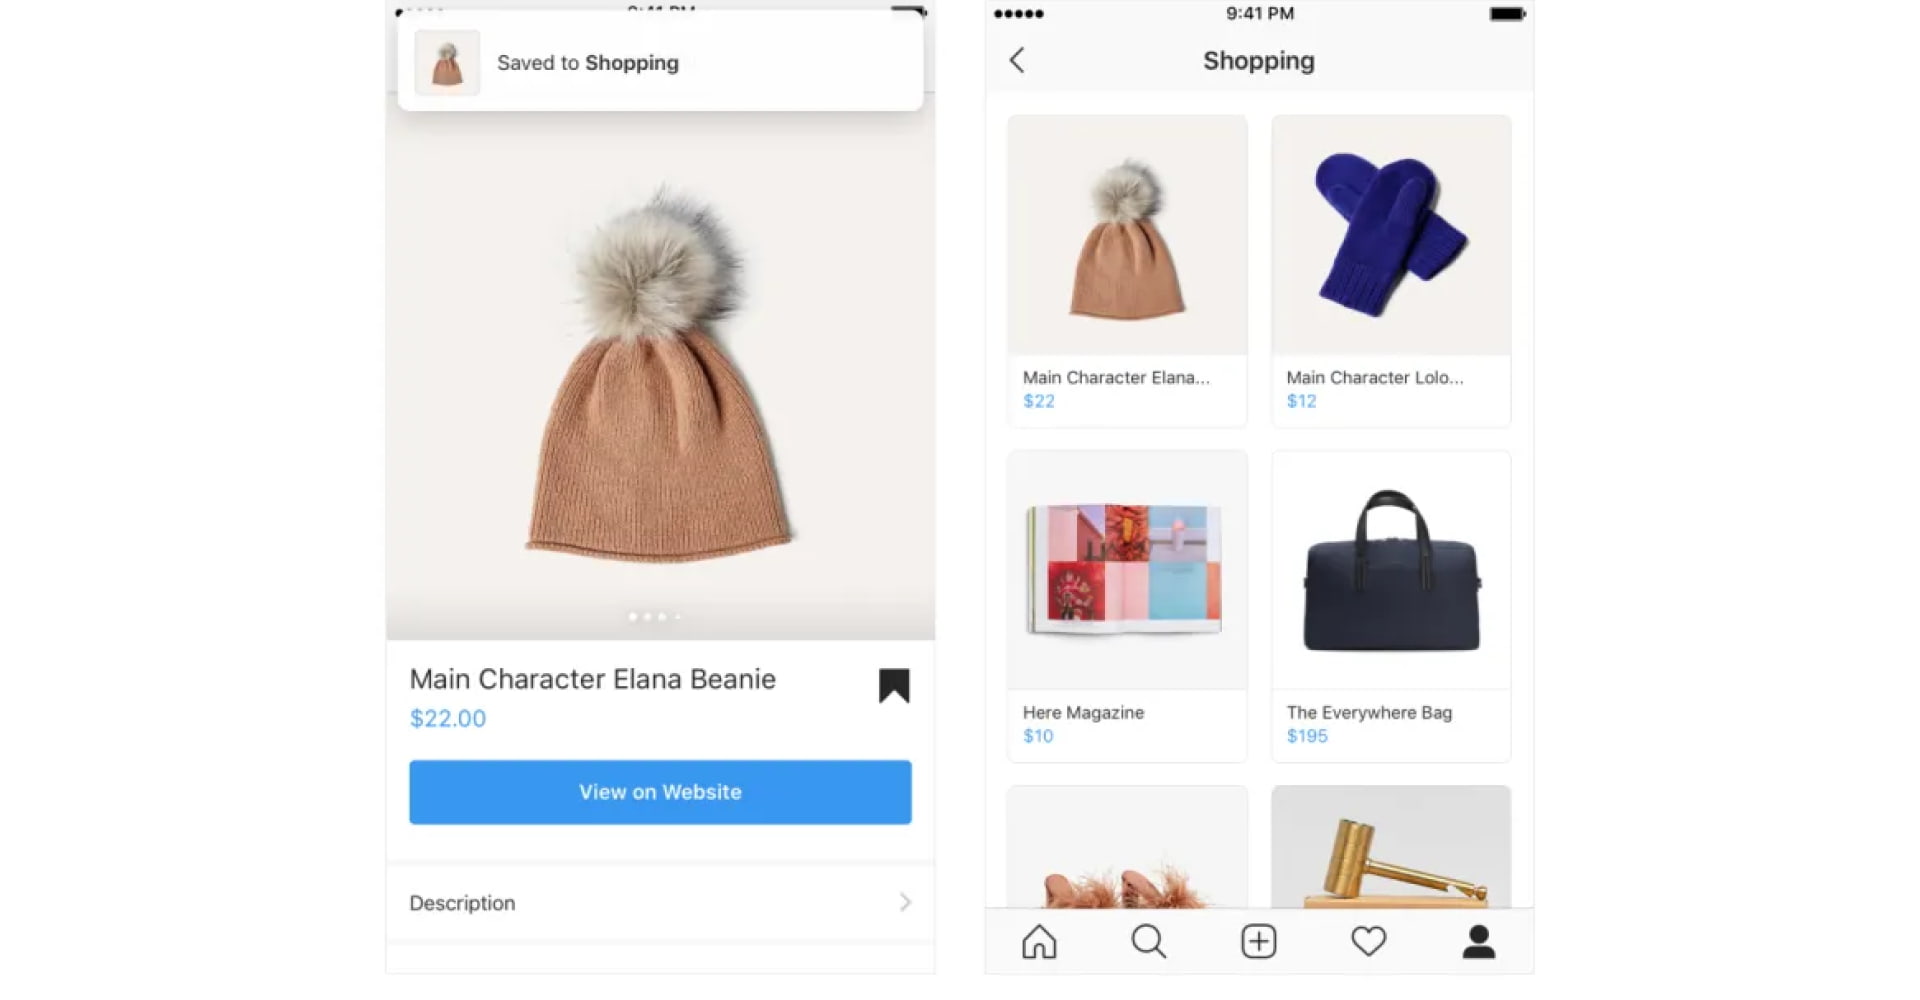
However, redirection to a website is the standard and primary model for Ukraine, European countries, and most other regions of the world. The customer views the product card on Instagram, clicks the «Checkout on Website» button, and is taken directly to the page for that item on your website, where they complete the purchase.
The main value of this tool is that it shortens the user’s journey from the moment of interest to the completion of the transaction. Businesses gain not just additional reach, but a measurable source of targeted traffic to their e-commerce platform.
Meta requirements and account setup
Attempting to enable Instagram Shopping without prior preparation is the most common reason for account suspensions or rejections by moderators. Meta specialists automatically analyze whether your business meets critical criteria. Therefore, before setting up Instagram Shopping, make sure you meet the following requirements.
- Sale of physical goods only. Meta Commerce policy clearly restricts the types of products. The tool is designed for brick-and-mortar retail, meaning that clothing, electronics, home decor, cosmetics, and similar items are permitted. It is prohibited to sell services, digital goods such as courses or e-books, online services, or excise-taxable goods via product tags.
- A fully functional e-commerce website is required. To operate in Ukraine, you must have an active website that allows customers to place orders directly. Simple landing pages without a shopping cart or profiles that accept payment only via credit card in private messages will not pass moderation. The website must clearly state contact information, shipping terms, return policy, and privacy policy.
- Instagram account type. The profile must have a professional status Business or Creator. Personal accounts do not have access to commercial tools.
- Meta Ecosystem. Your Instagram profile must be linked to a Facebook Business Page and connected to your Meta Business Manager.
- Geographic eligibility. Your business and target market must be located in countries where Meta Commerce features are supported. Ukraine is included in the list of supported regions.
Failure to meet even one of these requirements will almost certainly result in your account being put on hold or rejected. If your profile and website fully meet Meta criteria, you can proceed to technically link the elements of the ecosystem.
Step-by-step guide to setting up Instagram Shopping
Creating a visual storefront requires the sequential integration of several systems: Instagram, Facebook Page, Meta Business Manager, and Meta Commerce Manager.
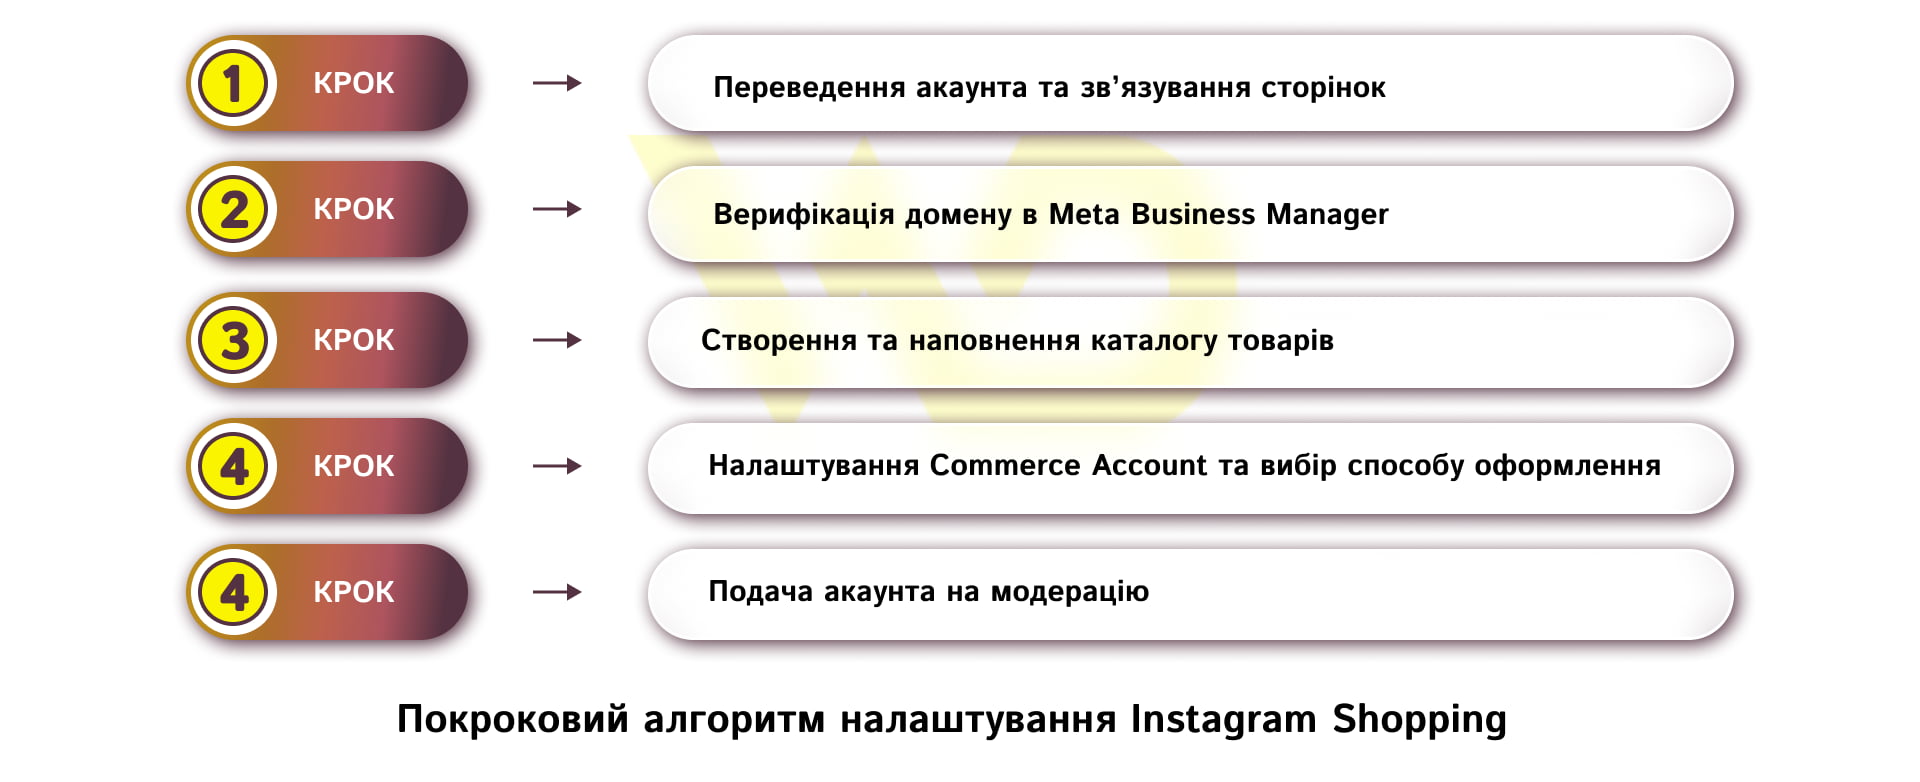
Step 1. Converting your account and linking pages
First, you need to consolidate your social media channels into a single business system.
- Open the Instagram app, go to «Settings & Privacy»→ «Account Type and Tools» and switch to a Professional Account (under the «Business» category).
- Open the Meta Account Center and add your official Facebook Page.
- Make sure you have admin rights for this Facebook Page and that it’s added to your Meta Business Manager.
Let’s look at an example using the fictional ceramics brand WarmClay. The Instagram profile @warmclay.ceramics must be directly linked to the Facebook page https://facebook.com/warmclay.ceramics.
Once linked, both pages will appear in Meta Business Suite as a single business entity with shared access to analytics and advertising tools.
Step 2. Verify the domain in Meta Business Manager
This step proves to Meta that you are the actual owner of the website and are not attempting to redirect users to third-party or phishing sites:
- Log in to Meta Business Manager using your administrator account.
- Go to «Business Settings»→ «Brand Safety»→ «Domains».
- Click «Add» and enter your website’s clean URL.
- Select a verification method (DNS record, HTML file, or meta tag in the website code) and click «Verify».
For the website warmclay.com.ua, the owner logs into the domain control panel on their hosting account and adds a TXT record in the format facebook-domain-verification=abc123xyz456.
Successful verification changes the domain status to a green «Verified» indicator, which dispels any concerns the algorithms may have regarding the security of your e-commerce platform.
Step 3. Creating and populating the product catalog
The catalog is a database of all your product listings. To work with it, use Meta Commerce Manager:
- Go to Commerce Manager, click «Create Catalog» and select the «E-commerce» type.
- Choose the best method for uploading data:
-
- automatic synchronization via CMS (Recommended): use ready-made modules for Shopify, WooCommerce, OpenCart, etc.;
- Upload via Data Feed (XML/CSV): Connect an automatically updated product feed via a link from your website;
- manual addition: filling out product cards one by one for niche markets with a small product range.
- Specify the required attributes for each product: SKU, name, description, direct URL, high-quality photo (at least 500×500 px), price, and currency (UAH).
The WarmClay online store on WooCommerce installs the official Facebook for WooCommerce plugin, which generates a link to the feed in the format [https://warmclay.com.ua/wp-content/uploads/facebook_products.xml](https://warmclay.com.ua/wp-content/uploads/facebook_products.xml). The system automatically imports the «Mint» mug with SKU WC-CUP-01, a price of 520 UAH, and a direct link to its product page.
Automated synchronization ensures that if the cup runs out of stock on the website, it will instantly disappear or be marked as «Out of Stock» on Instagram as well.
Step 4. Configuring the commerce account and selecting a checkout method
Now you need to tell the system where the user will be redirected after clicking on a product tag.
- In Commerce Manager, open the settings for the Commerce Account you created.
- Under «Checkout Method», select «Checkout on Website».
- Enter your verified domain and link the catalog you created to your account.
- Make sure your Instagram profile is designated as the active resource for this catalog.
When a customer clicks on the ceramic plate tag in a post by @warmclay.ceramics, the system opens the product card. By clicking «View on Website», they are taken directly to the page warmclay.com.ua/product/mint-plate, where the shopping cart and online payment are already integrated.
A properly configured redirect eliminates any technical glitches during the transition and makes the path to purchase as seamless as possible.
Step 5. Submitting the account for moderation
The final technical step is performed directly from a mobile device.
- Open the Instagram app on your business profile.
- Go to the «Settings» menu→ «Business» (or «Creator Tools»)→ «Set Up Instagram Shopping».
- Select the connected product catalog from the list and confirm the submission of your request.
In our example, «WarmClay Main Catalog» will appear in the list of catalogs. After selecting it, the system will notify you that the account has been submitted for review, and the status «Pending» will appear in your settings.
Automatic review typically takes anywhere from a few hours to 3–5 business days. As soon as Meta moderators confirm that your profile and catalog comply with all rules, you’ll receive a notification, and the «Tag Products» button will become available when you publish content.
Integrating products into content: tagging in posts, stories, and reels
Once your account has been verified and approved, the «Shopping» section will appear in your profile settings, and the «Tag Products» feature will become available when you publish content.
|
Content format |
Tagging options |
Recommendation |
|
Feeds |
Up to 5 products per photo or up to 20 products in a carousel |
Don’t overload the frame with tags. Place the tag directly on the item in the photo so as not to obstruct the composition |
|
Stories |
«Product» sticker (1 sticker per Story) |
Use stickers in product reviews, «before and after» layouts, or when announcing discounts. You can customize the sticker’s color to match your layout’s design |
|
Reels |
Up to 30 products or one themed collection in a single video. |
Product tags appear at the bottom of the screen while watching the video. Works perfectly for unboxing videos, try-on videos, or instructional videos |
And here’s a key content strategy tip: don’t turn your profile into nothing but a catalog. Combine native product tags with expert, brand-building, or user-generated content (UGC).
Common issues, moderation rejections, and how to resolve them
Even when following the instructions exactly, a business may encounter technical glitches or Meta’s refusal to enable the tool. Let’s look at common issues and how to resolve them effectively.
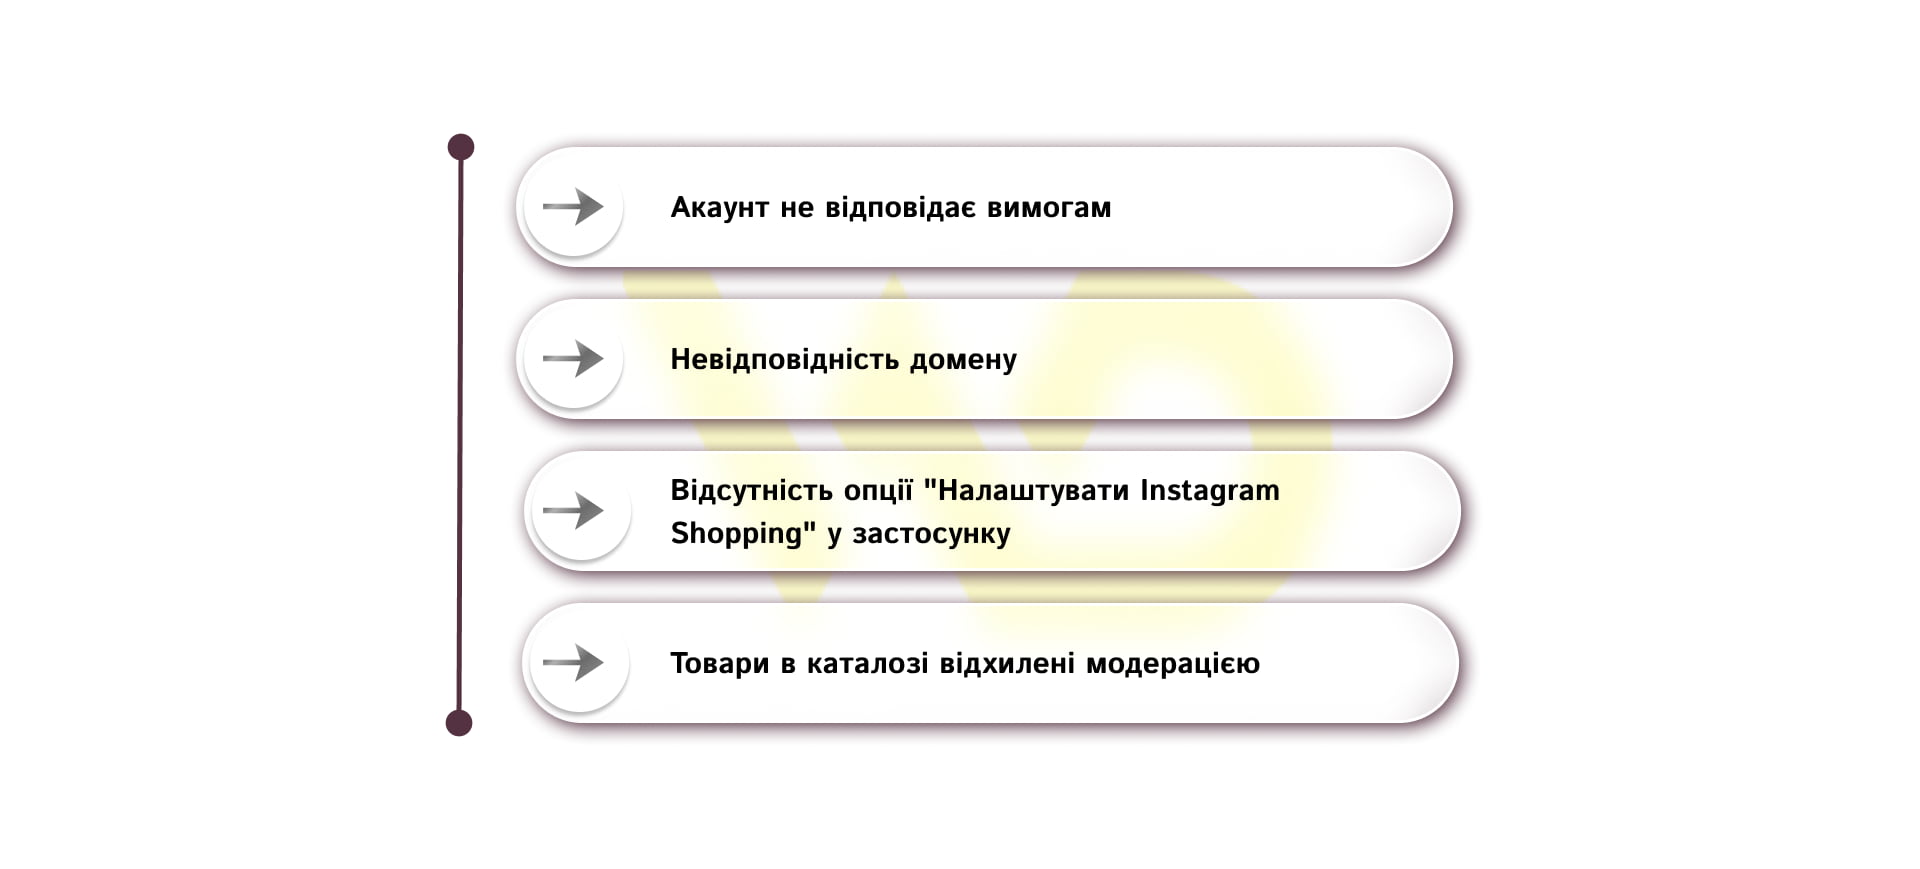
«Account does not meet requirements»
This is most often due to a lack of domain verification, an attempt to sell services or digital goods, or the absence of required legal pages on the website (return policy, contact information).
The solution is to check your website for compliance with Commerce Policies. Make sure your domain is verified in Business Manager. After correcting the errors, file an appeal through the Meta Business Help Center or resubmit your application in Commerce Manager.
Domain mismatch
This occurs because the links in the product catalog point to one domain, such as shop.yourstore.com, while the primary domain confirmed in Meta Business Manager is yourstore.com.
To fix this, use a consistent URL structure in your product feed. The domain in the product card must strictly match the verified resource.
«Set Up Instagram Shopping» option missing in the app
The reason is a connection error between profiles or a lack of administrator permissions in Meta Business Suite.
In this case, you need to check in Meta Business Suite to see if your personal Facebook profile is an administrator with full access to the Page, Business Account, and Catalog. Try unlinking your Instagram profile from your Facebook Page and linking it again.
Items in the catalog have been rejected by moderation
This may be caused by incorrect descriptions, the use of trigger words that set off the automated review system such as the names of medications, brand names, etc. or images of insufficient quality.
To fix the issue, go to Commerce Manager → «Catalog» → «Products». Find the items with the «Rejected» status, review the reason, edit the product cards on your website or in your feed, and resubmit them for review.
Setting up an Instagram product catalog is a technical process that requires attention to detail and strict adherence to Meta’s ecosystem rules. By investing time in properly configuring Commerce Manager, verifying the domain, and structuring the catalog, a business gains not just additional buttons on its profile, but an effective, transparent, and measurable tool for driving sales growth.

commercial offer
Other articles by the author

20/03/2026
An ambassador isn’t just a marketing channel—it’s a multifunctional resource: trust, content, traffic, reputation support, and product narrative.

03/03/2026
The main purpose of a reference is to show direction. That is, style, composition, color scheme, tone of message, or desired interface behavior.

18/06/2026
A strong script for Direct is built as a sequence of logical elements, where each has its own function and does not overload the dialogue.
Latest articles by #Useful tips

09/09/2026
The Facebook lead form helps businesses collect contact information from potential customers directly from an ad, without requiring them to visit the website.

08/09/2026
Today, an influencer is a distinct media platform with its own editorial policy, a keen understanding of its audience, and an established level of trust.
04/09/2026
Instagram Shopping is a set of Meta features that allows businesses to integrate their product catalog with their social media profile.