

 09/09/2026
  1532
1532

Інтернет-маркетинг
простою мовою
Content of the article
- /01 What is a Facebook lead form and how does it work
- /02 When to use a lead form
- /03 What to prepare before creating a form
- /04 How to create a lead form on Facebook: a step-by-step guide
- Step 1. Create a campaign with the «Leads» objective
- Step 2. Select «Instant Form»
- Step 3. Set up your audience and budget
- Step 4. Create an «Instant Form»
- Step 5. Set up the introductory section
- Step 6. Add contact information and questions
- Step 7. Add privacy information
- Step 8. Set up the confirmation screen
- Step 9. Review the form and publish the ad
- /05 What happens after the form is published
- /06 How to improve the quality of leads from Facebook

How to create a lead form on Facebook: a step-by-step guide

A Facebook lead form helps businesses collect contact information from potential customers directly from an ad, without requiring them to visit the website. It’s a convenient way to collect applications, schedule consultations, receive requests for quotes, or follow up with potential customers.
In this article, we’ll look at how to create a lead form in Meta Ads, what data and questions to include, how to configure the form, and what to do with the leads you receive after launching your ad.
What is a Facebook lead form and how does it work
A Facebook lead form is a form for collecting contact information from potential customers that opens immediately after a user interacts with an ad. In the Meta ecosystem, this format is called Instant Form.
Unlike a standard website form, Instant Form does not require users to navigate to a separate web page. Users remain within the Meta environment: they open the form, review or fill in the suggested information, answer additional questions if needed, and submit the form. Some contact information may be pre-filled, which reduces the number of steps required to submit the form.
Here’s how it works:
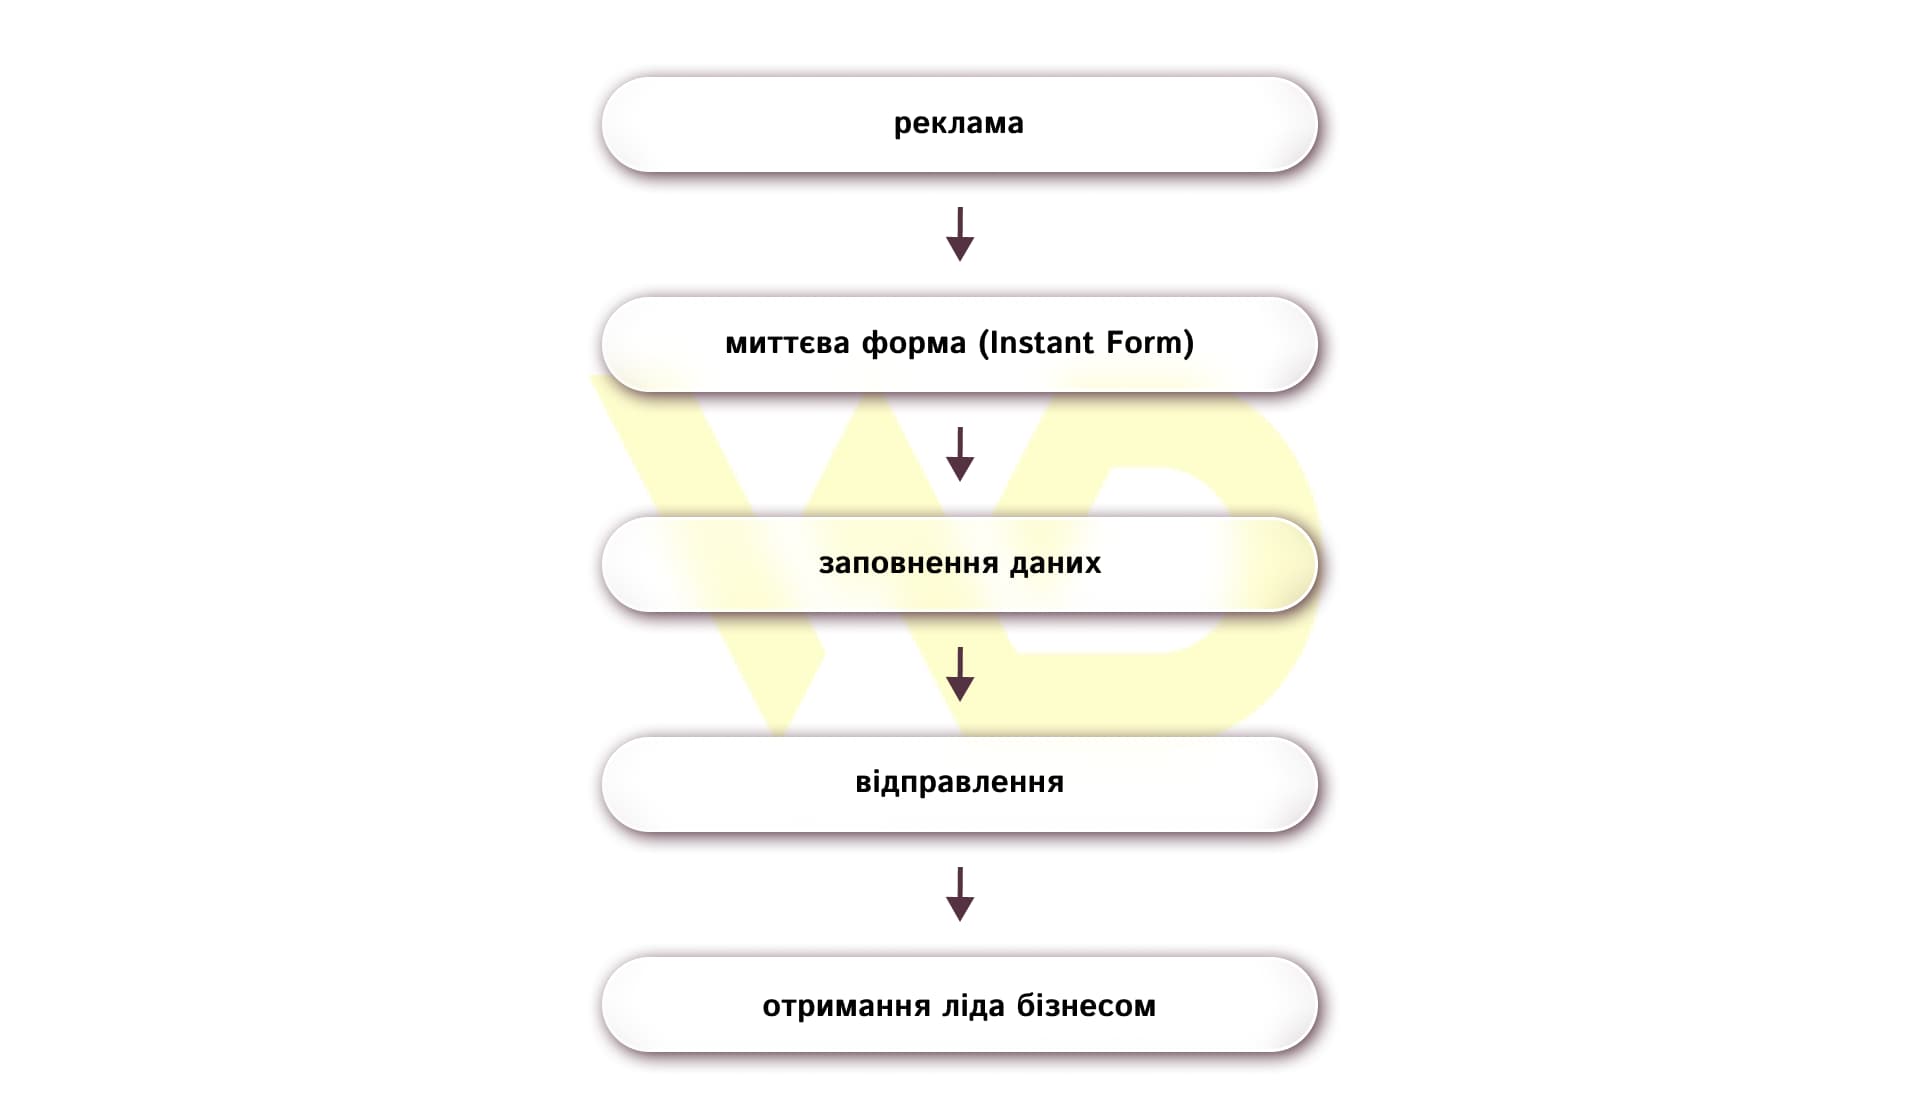
The form can request basic contact information, such as name, phone number, or email, and include questions to better understand the potential customer’s needs. The specific data to collect depends on the advertising objective for a simple request, 1–2 contact fields may suffice, while a more complex service may require additional qualifying questions.
Once the form is submitted, the contact becomes a lead that the business can follow up on. You can retrieve this lead using Meta tools or automatically transfer it to your CRM. For regularly handling a large volume of inquiries, the second option is more convenient, as it reduces the risk of losing a new contact.
At the same time, Instant Form isn’t always the best way to collect a request. If a customer needs to familiarize themselves with the product in detail, perform a more complex action, or fill out a detailed form on the website before making an inquiry, it may be more appropriate to direct them to a web page. Meta treats Instant Form and Website as distinct conversion points and recommends choosing between them based on the customer interaction scenario.
Thus, the main feature of the lead form is a shorter path from the ad to contact. Businesses gain the ability to collect lead forms without creating a separate landing page for each ad campaign, and users don’t need to leave the platform to submit their information.
When to use a lead form
It makes sense to use a lead form when the main goal of the ad is to obtain a person’s contact information and continue communicating with them. This is especially convenient for offers that do not require a complex application process.
With a lead form, you can:
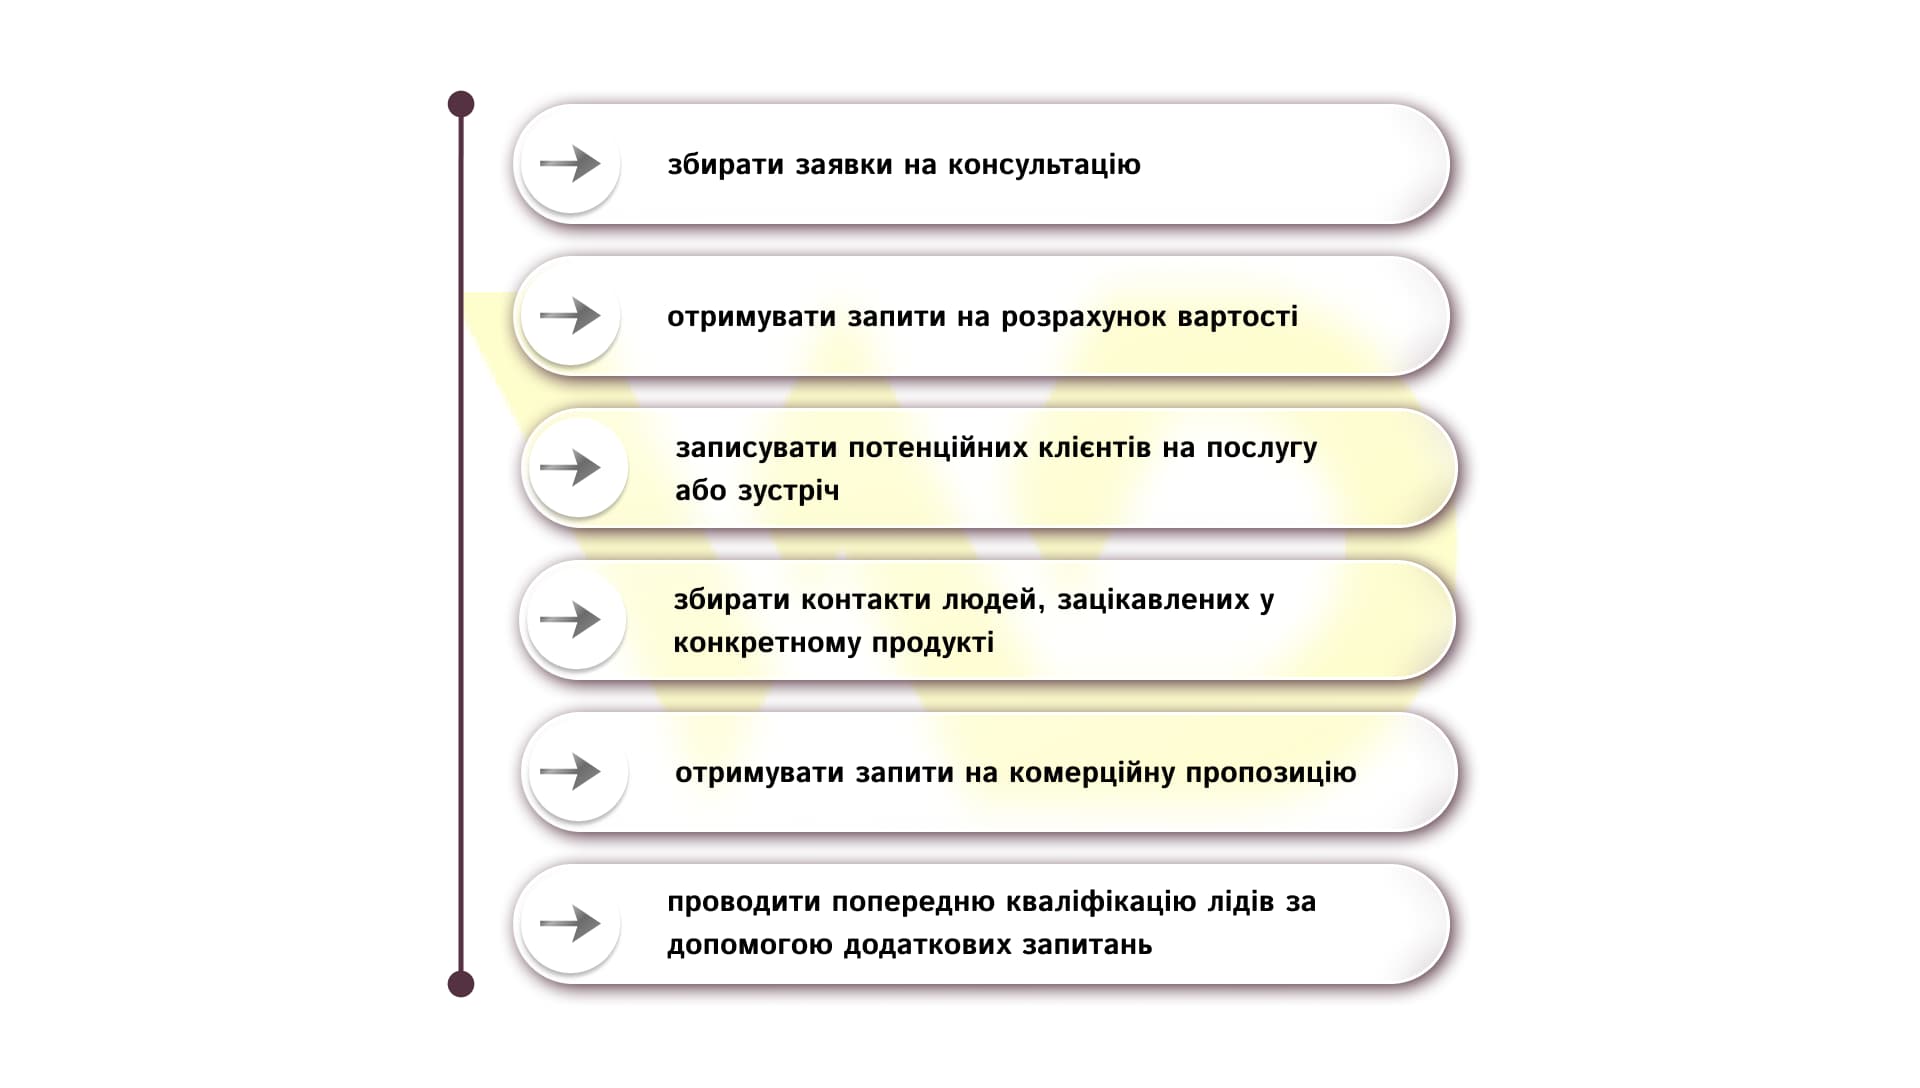
For example, an advertising agency might offer a free website audit. In this case, the user simply needs to provide their name, email address, and a link to their website, after which a specialist can contact them or prepare the audit results.
Another scenario involves a service that requires preliminary client screening. For example, a company that performs comprehensive renovations might add questions to the form about the type of space and its square footage. This allows the company to gather more information even before the manager makes initial contact.
However, additional questions aren’t necessary for every campaign. If the manager will gather the necessary information during the first conversation anyway, a short form may be more convenient. If, on the other hand, each request requires significant team resources, pre-qualification will help filter out some of the irrelevant inquiries.
There are also situations where it’s better not to use an Instant Form. For example, if a customer needs to review a large amount of information, compare products, read the terms and conditions, or perform a specific action on the website before submitting an application. In such cases, it’s better to direct the user to the website, where they can learn more about the offer and submit an application.
Therefore, when choosing a lead form, you should start not with the tool itself, but with the question: what action should a potential customer take, and what information does the business need to obtain at this stage?
What to prepare before creating a form
To avoid having to figure out the form’s structure while you’re setting it up, prepare the main elements in advance.
- Formulate your offer.
Determine exactly what the person will receive after submitting the form: a consultation, a cost estimate, a commercial offer, an appointment, etc. The wording in the ad and on the form should match.
- Determine the necessary contact information.
Think about what the manager needs for the initial contact. If a name and phone number are sufficient, there’s no need to add fields to the form that won’t be used.
- Decide whether preliminary qualification is necessary.
If certain client characteristics are important for processing the request, prepare one or more relevant questions. For example, this could be the type of service, the scope of the project, or other information that affects further communication.
- Prepare a privacy policy.
Check in advance that your website has an up-to-date privacy policy page and that a link to it can be added to the form.
- Design the completion screen.
Determine what the user should see after submitting a request and whether they need to take the next step: wait for a call, visit the website, browse the catalog, or take another action.
- Determine how you will handle leads.
Decide in advance who will receive new inquiries and where they will be stored. For a small number of contacts, Meta tools may be sufficient, but if there is a steady flow of inquiries, you should plan to transfer the data to a CRM.
- Prepare your advertising materials.
The form is part of the advertising strategy, not a standalone tool. The creative, the offer, and the form should all guide the user toward the same action.
This preparation will help you create a short form without unnecessary fields while still capturing the information you truly need to follow up with a potential customer.
How to create a lead form on Facebook: a step-by-step guide
Lead forms are created in Meta Ads Manager Meta advertising dashboard. The names of individual elements may vary slightly depending on the interface language or updates to the advertising dashboard.
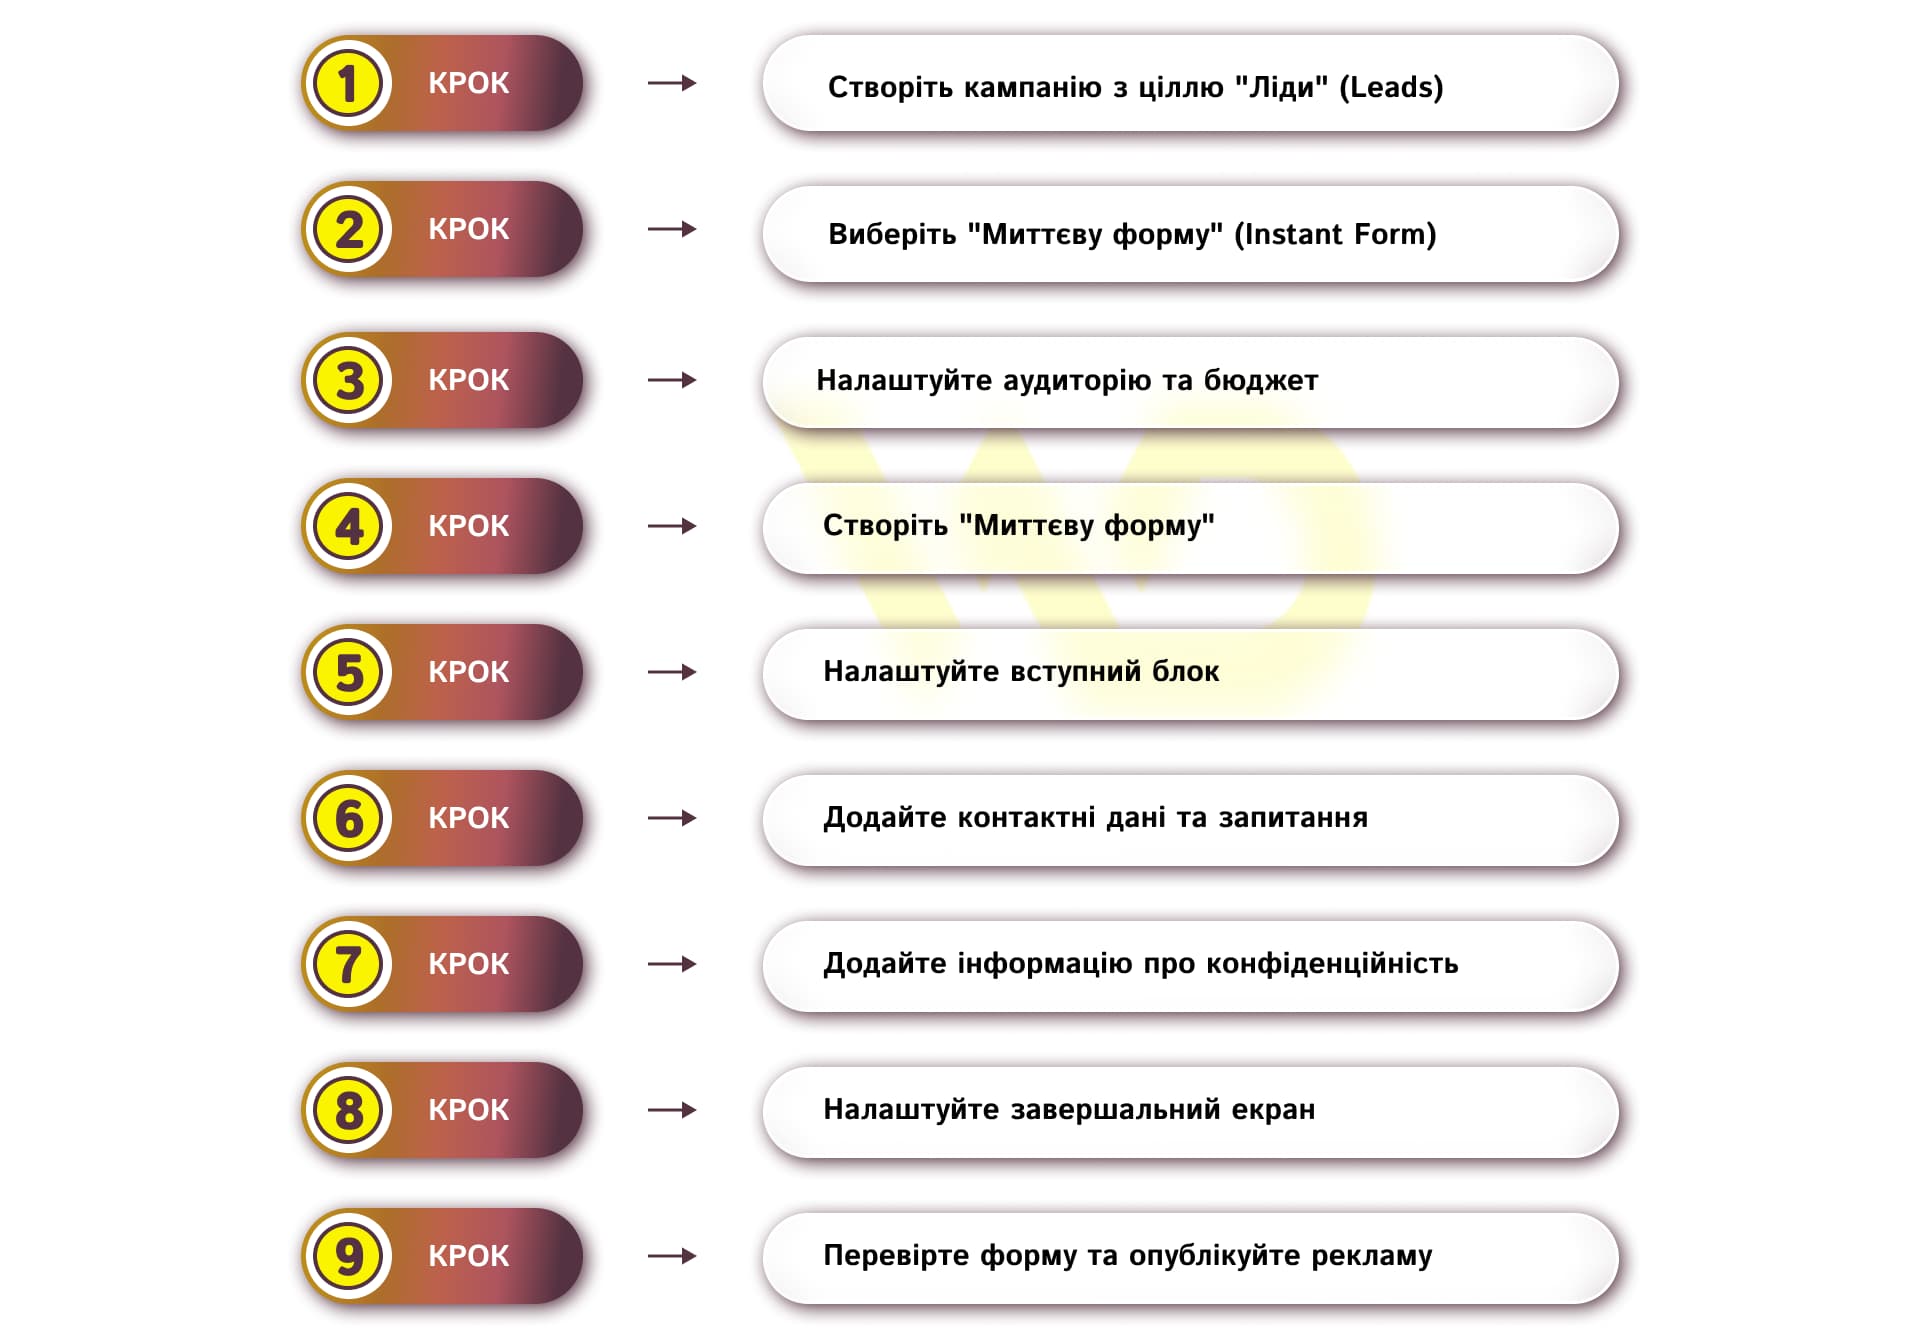
Step 1. Create a campaign with the «Leads» objective
Open Meta Ads Manager and create a new ad campaign. When selecting an objective, choose «Leads». This objective is designed for campaigns aimed at generating leads through forms, messages, or calls. In our case, we need a form. After selecting the objective, proceed to setting up your ad set.
Step 2. Select «Instant Form»
At the ad set level, you need to specify where the conversion will take place. For this guide, select «Instant Form». Meta may also offer other conversion locations, such as «Website». In this case, after interacting with the ad, the user is directed to the website and submits a form there. If you need to shorten the path to contact and receive a lead without redirecting to an external page, use a lead form.
Step 3. Set up your audience and budget
At this stage, determine who will see the ad, set your budget, and, if necessary, specify the schedule and other campaign settings. The specific settings depend on your advertising strategy, and you don’t need to change them just because the campaign uses a lead form.
It’s important that the audience, the ad offer, and the form itself align with one another. If the ad is shown to irrelevant users, changing the questions in the form won’t solve the problem of lead quality.
Step 4. Create an «Instant Form»
After selecting «Instant Form», start creating a new form. First, give it an internal name. This is necessary for managing your ad campaigns efficiently, especially if you’re creating multiple forms. For example, instead of «Form 1», it’s better to name it «Consultation — Apartment Renovation» or «Website Audit — August 2026».
Next, Meta will ask you to select a form type. Depending on the available settings, these may be «More Volume» and «Higher Intent».
- «More Volume» is designed to simplify the form-filling process and increase the number of submitted forms. This option may be suitable when the main goal is to collect more contacts, and a manager will verify their suitability after they’re received.
- «Higher Intent» involves an additional step before submitting the form. It’s appropriate when it’s more important to receive more informed submissions, even if some users choose not to complete the form.
Therefore, the choice should not be based on which option is «better», but rather on the campaign’s objective: to collect the maximum number of contacts or to prioritize their quality.
Step 5. Set up the introductory section
At the beginning of the form, you need to explain to the user what they will receive after submitting the application. The text in this section should align with the ad’s promise. If your ad promises a free consultation, the form should briefly confirm that after filling it out, the person will indeed receive that consultation. There’s no need to repeat the entire ad copy, since the purpose of the introductory section is to provide the user with enough information to understand the next step.
Step 6. Add contact information and questions
In this section, determine what information you need to collect from a potential customer. First, add the necessary contact information: for example, name, phone number, or email address. Meta may suggest some of this information to the user for auto-fill.
Next, decide whether you need additional questions. If it’s enough for the manager to get a phone number and clarify details during the call, it’s best to keep the form short. If, however, you need to know certain characteristics of the potential customer before making contact, add the appropriate qualifying questions. For example, a renovation company might ask about the type of property and its square footage. This will help the manager better prepare for the conversation.
Don’t add questions just to collect «as much information as possible». Every field should serve a practical purpose. If the answer isn’t used during follow-up with the lead, it’s better to remove that question.
Step 7. Add privacy information
The form must provide users with the opportunity to review information about the processing of their personal data. Add a pre-prepared, up-to-date privacy policy page from your website and include a link to it in the appropriate section of the form. If your business requires additional consents or legal language, these should be defined separately in accordance with the requirements applicable to your specific business and market.
Step 8. Set up the confirmation screen
After submitting the form, the user will see a confirmation screen. Here, you should confirm that the request has been received and, if possible, explain the next step. For example, you can state: «Thank you for your request. A manager will contact you to clarify the details.».
If, after filling out the form, the user should visit the website, browse the catalog, or take another action, you can also suggest this on the completion screen. It’s important that the message aligns with the company’s actual workflow.
Step 9. Review the form and publish the ad
Before publishing, review the form in preview mode.
Check:
- whether the form’s content matches the ad’s offer;
- whether there are any unnecessary fields or questions;
- whether the contact information is correct;
- whether the link to the privacy policy works;
- whether the final screen is clear;
- Is the entire user journey from the ad to submitting the application logically structured?
After reviewing, save the form and finish setting up the ad.
The specific placement of individual elements may change with Ads Manager updates, but the setup logic remains the same.
What happens after the form is published
Once the ad launches, completed forms will start coming in. But obtaining a contact is just the beginning of working with a lead.
If applications are processed manually, they need to be checked regularly and forwarded to a manager. For a small volume, this may be sufficient. With a larger number of applications, it makes more sense to automate the transfer. Meta recommends connecting a CRM so that new leads are sent there without manual upload. If you don’t have your own CRM, you can use Meta’s available tools to work with leads, such as Leads Center.
This is important for more than just convenience. If communication breaks down between the advertising team and the sales department, even a well-optimized campaign won’t deliver the expected results for the business.
How to improve the quality of leads from Facebook
Start not with the number of inquiries, but with who exactly you consider a high-quality lead. For one business, it’s someone who left a phone number. For another, it’s a potential customer with a specific budget, a concrete need, and a willingness to consult. This definition influences the entire structure of the campaign.
You should also evaluate the campaign based on more than just the number of inquiries. Compare how many leads you were able to follow up on, how many of them meet the criteria for your target customer, how many moved on to the next stage, and how many resulted in a sale.
If your CRM is integrated, this data can be used to send signals about converted leads to Meta via the Conversions API. The platform explicitly recommends this approach to optimize for quality, rather than just the fact that a form was filled out.
It’s also a good idea not to test everything at once. You can compare different offers, question options, or form types separately and look not only at the cost per lead but also at the quality of the contacts received.
Ultimately, a good lead form isn’t one that simply collects a lot of phone numbers. It should align with the ad offer, require only the necessary actions from the user, and provide the business with information that the team can actually work with. And after launch, it’s important to evaluate the entire journey from filling out the lead form to the actual result for the company.

commercial offer
Other articles by the author

20/10/2026
Ben Hunt's model is a tool that helps break down a customer's path to purchase based on their level of awareness and select the right messages for each stage.

02/09/2026
The effectiveness of product ads on Google Shopping and Performance Max depends directly on the quality of the product feed.

09/09/2026
A well-chosen domain name strengthens the brand, shapes customers' first impressions, and facilitates search engine optimization, whereas a mistake at the outset can cost a company lost traffic and reputational risks.
Latest articles by #Useful tips

22/10/2026
To properly link Instagram to Facebook, you need to distinguish between the different types of accounts within the Meta ecosystem, since confusion between a personal profile and a business page is the most common cause of errors during setup.
20/10/2026
Ben Hunt's model is a tool that helps break down a customer's path to purchase based on their level of awareness and select the right messages for each stage.

06/10/2026
From a business perspective, updating content is a sensible way to protect existing investments.